A Brief History of the Microscope
- Microscopy techniques have developed over time, increasing our understanding of cell structures and organelles
- This has also increased our understanding of the role of subcellular structures
- The first light microscopes were developed in the 17th Century
- Scientists such as Anton van Leeuwenhoek and Robert Hooke are responsible for using microscopes to develop our first understanding of cells
- The first cells (of a cork) were observed by Robert Hooke in 1665 using a light microscope
- Light microscopes use light and lenses to form a magnified image of a specimen
- Over the centuries, the design of the light microscope has evolved, increasing magnification and resolution to enhance the detail of what can be visualised
- With a modern light microscope, it is possible to see images of cells and large subcellular structures (like nuclei and vacuoles), although stains are often required to highlight certain parts of cells
- The most powerful light microscopes today have a maximum magnification of approximately 1000 to 2000x
- The first electron microscopes were developed in the first half of the 20th Century (in the 1930s)
- Electron microscopes use beams of electrons, rather than light, to visualise specimens
- The wavelength of an electron beam is much smaller than that of visible light, which gives electron microscopes a much higher resolution and magnification
Electron Microscopes
- An electron microscope has much higher magnification and resolving power than a light microscope
- They can therefore be used to study cells in much finer detail, enabling biologists to see and understand many more subcellular structures such as the mitochondria, chloroplasts and ribosomes
- They have also helped biologists develop a better understanding of the structure of the nucleus and cell membrane
- Electron microscopes have a maximum magnification of approximately 2,000,000x

An example of an electron micrograph (of ciliated epithelium tissue) produced by an electron microscope. Notice the high level of detail included. The colour has been added by a computer programme.
Magnification Calculations
- Magnification is calculated using the following equation:
Magnification = Drawing size ÷ Actual size
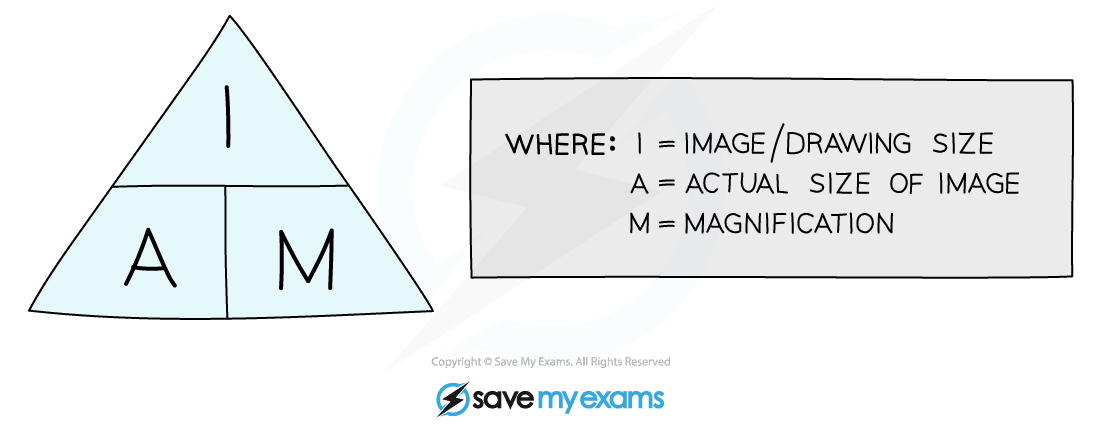
- A better way to remember the equation is using an equation triangle:
An equation triangle for calculating magnification
- Rearranging the equation to find things other than the magnification becomes easy when you remember the triangle – whatever you are trying to find, place your finger over it and whatever is left is what you do, so:
- Magnification = image size ÷ actual size
- Actual size = image size ÷ magnification
- Image size = actual size × magnification
- Remember magnification does not have any units and is just written as ‘X 10’ or ‘X 5000’
Worked Example
An image of an animal cell is 30 mm in size and it has been magnified by a factor of X 3000. What is the actual size of the cell?
To find the actual size of the cell:
Worked example using the equation triangle for magnification
- You may also be asked to calculate the total magnification of a light microscope if given the magnification of the eyepiece lens and the magnification of the objective lens
- As these are two separate parts of a light microscope, each with its own magnifying power, you can simply multiply the two values to calculate the total magnification:
Magnification of light microscope = Magnification of eyepiece lens × Magnification of objective lens
Exam Tip
It is easy to make silly mistakes with magnification calculations. To ensure you do not lose marks in the exam:
- Always look at the units that have been given in the question – if you are asked to measure something, most often you will be expected to measure it in millimetres NOT in centimetres – double-check the question to see!
- Learn the equation triangle for magnification and always write it down when you are doing a calculation – examiners like to see this!


